Efficiently automating DISA STIGS: a guide to automated STIG hardening with RKE2
In today's cybersecurity landscape, DISA STIGs (Security Technical Implementation Guides) are an increasingly popular implementation for organizations worldwide, including our clients, seeking robust security measures. Developed by the US Department of Defense, DISA STIGs fortify information systems and software, expanding their adoption beyond the defense sector due to their comprehensive nature. From network infrastructure to desktop applications, DISA STIGs provide a robust shield against security threats, continually evolving to address new challenges.
Implementing STIGs can be complex, especially for smaller security teams lacking effective automation. Initially, at Glasswall, we used commercial tools for "Stigging," but they presented challenges like overheads and poor integration into our CI/CD pipeline, often requiring manual intervention.
To address these challenges, we shifted to open-source software and leveraged CI/CD, Ansible, Packer, and OpenSCAP. This maintained coverage while drastically reducing manual intervention and overhead, allowing us to respond swiftly to new STIGs. Our transformation in implementing DISA STIGs highlights our commitment to client security and process optimization. Here in part two of our secure software development series, we'll delve into our automated process with OpenSCAP, Ansible, Packer, and DISA STIGs.
Streamlining DISA STIG Automation: Tools and Processes
The Defense Information Systems Agency (DISA) updates its STIGs quarterly, which can be accessed on their official website in XML format. These guides are split into three levels: CAT 1, CAT 2, and CAT 3. Users can utilize STIGViewer, a desktop application, to interact with these guides conveniently. OpenSCAP, managed by the National Institute of Standards and Technology (NIST), is instrumental in our DISA STIG automation process. It offers a suite of tools for configuration and vulnerability scans, enabling automation of verification checks within the XML or SCAP content provided by DISA. Additionally, OpenSCAP's vulnerability scanning feature allows us to ensure the system hardened with STIGs is free from Common Vulnerabilities and Exposures (CVEs). To further enhance our infrastructure, we utilize Ansible and Packer in tandem to provision, configure, and manage our target system. Packer processes a JSON file containing specific actions, each contributing to the DISA STIG automation process. Below, we'll provide a walkthrough of each step in our efficient and effective DISA STIG automation process.
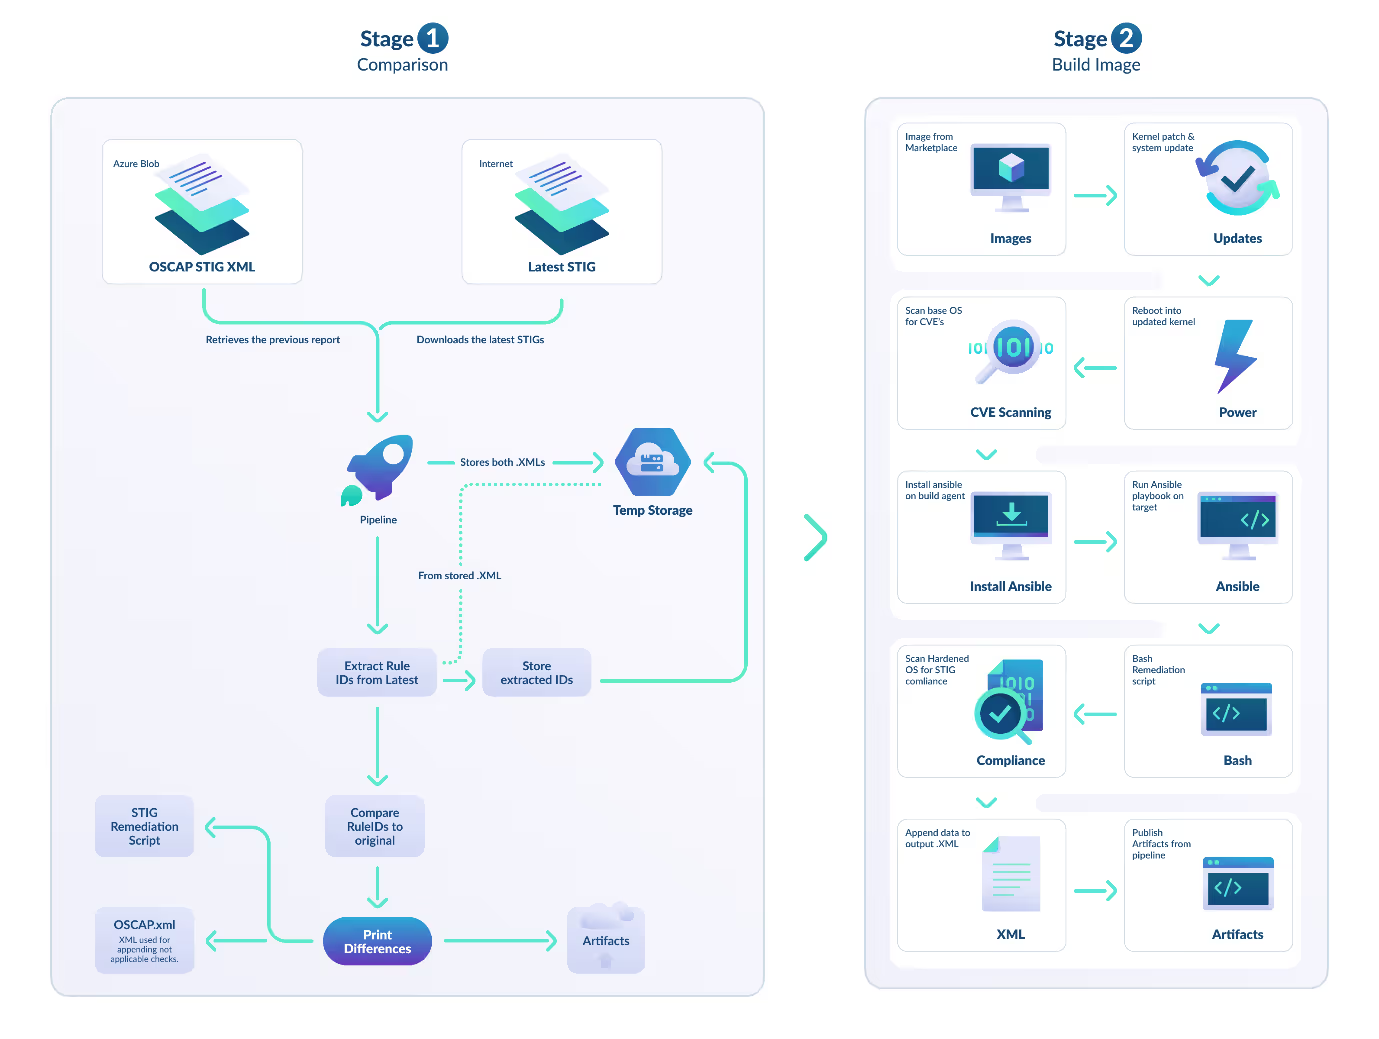
The Automation Process
Stage 1
Comparison: preparing the STIGs
To ensure comprehensive coverage of the latest STIGs, we begin with a comparison stage. This process involves comparing the RuleIDs obtained from the previous OSCAP STIG Scan with the latest STIG release from DISA. The stage comprises three key steps:
Retrieving Previous OSCAP STIG Scan:
The previous OSCAP reports are placed in our storage system.
This job retrieves the latest report from the storage blob, downloading and storing it into the temporary directory.
Downloading and Extracting Latest STIG Release from DISA:
The extracted XML is searched for any rules matching the pattern SV-[0-9]+r, representing the Rule Title of the STIG.
Each line of the extracted file is compared against the previous OSCAP report obtained in step 1.
Any differences in RuleIDs are saved into a differences.txt file.
By uploading this differences.txt file into storage, we can identify any STIGs requiring inclusion in our subsequent remediation steps, as outlined below.
Stage 2
After comparing the delta from the previous STIG release, our next step is to apply the STIGs using Ansible and Packer.
Preparing the plain image
To ensure we're hardening against a plain, vanilla image, we obtain it from the relevant marketplace and conduct initial image and kernel updates to ensure it's the latest version.
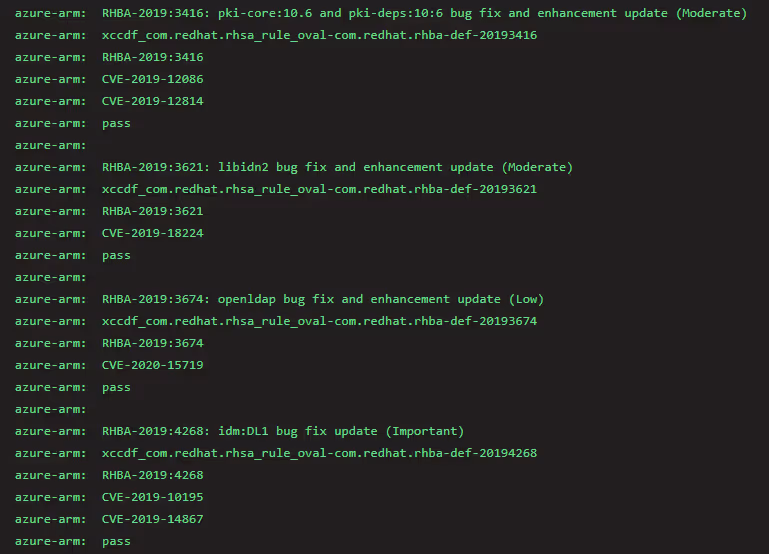
Once the image is updated, we use OpenSCAP to verify it's free from any CVEs. This involves installing the OpenSCAP scanner, downloading the necessary checks for the OS, and initiating OSCAP. We obtain the relevant CVE scan information here.
The CI/CD output appears as follows:
If any CVEs are detected within the base image, the pipeline will fail and provide the reason for the failure. This ensures that we do not apply STIGs on top of an insecure image.
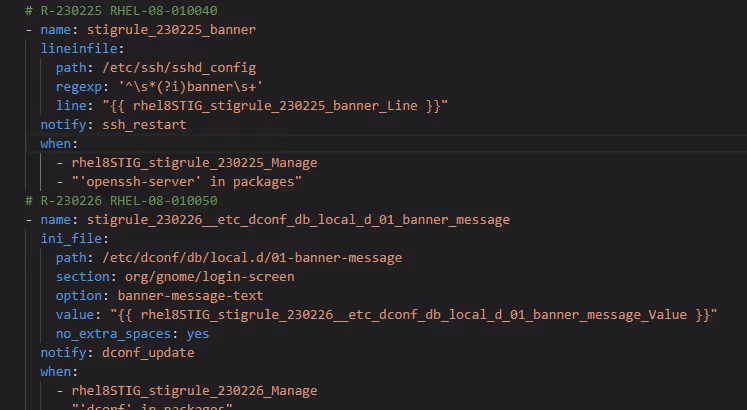
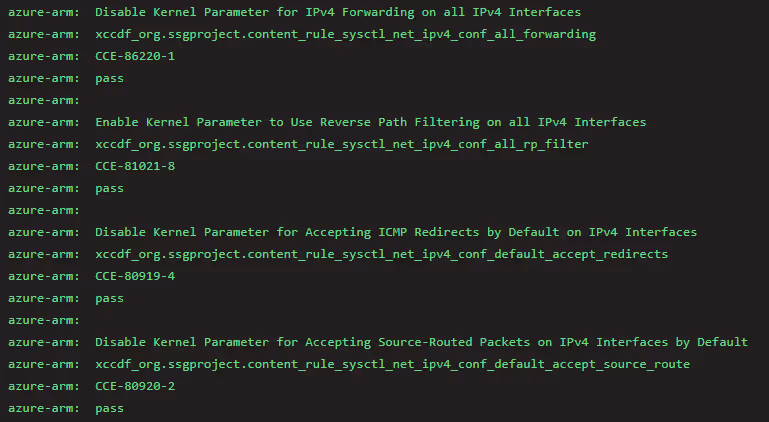
Each playbook contains multiple STIG rules tailored to the specific system being hardened. These rules outline the necessary actions to mitigate each identified vulnerability, an example:
This playbook is designed to initiate the initial remediation process based on the STIGs obtained from DISA.
Bash remediation script
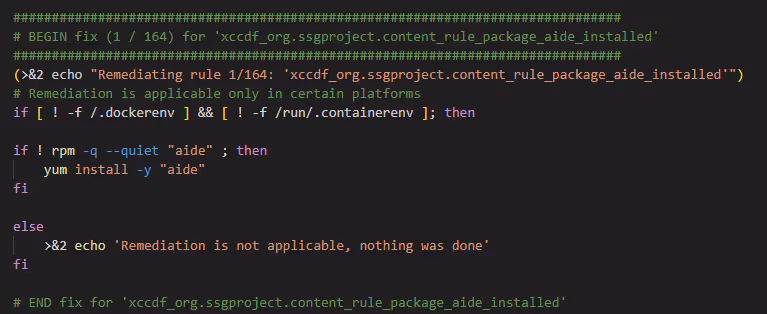
After executing the Ansible playbook, any remaining unremediated STIGs are automatically addressed using OpenSCAP.
OpenSCAP offers a feature to generate a bash remediation script, named 'stig-bash-remedation.sh', which is created using the following command:
This bash script systematically manages each failed STIG rule by attempting to apply the corresponding 'Fix Text', like the functionality of the Ansible playbook.
Additionally, the bash script can be manually added to include any STIGs that need implementation but aren't suitable for automatic application.
Verifying STIG compliance with OSCAP
After executing the Ansible playbook and the stig-bash-remediation script, we employ OpenSCAP's STIG scanning feature to assess our compliance with the implemented STIGs. The OSCAP STIG scan is conducted using the following command:
In that command, we specify the profile to execute a STIG scan, utilizing the STIG configuration for the chosen operating system (These configurations come pre-bundled with OpenSCAP after installation, you’ll find them inside /usr/share/xml/scap/ssg/content).
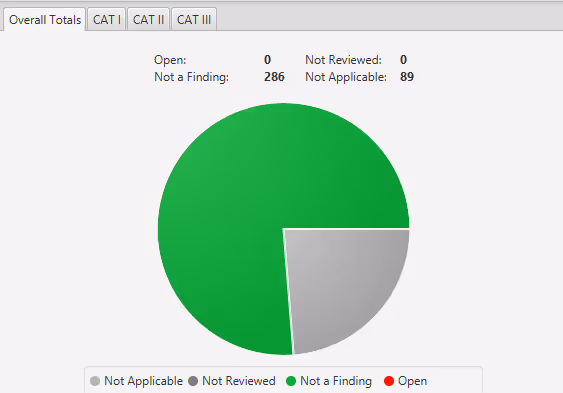
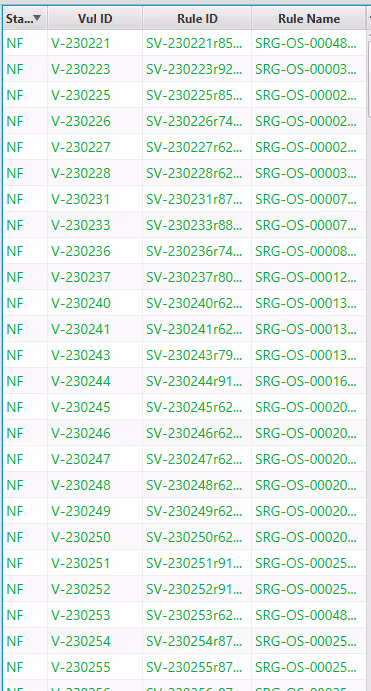
The XML for STIGViewer
The automation process wraps up by generating scan results in an XML format known as XCCDF. This file is imported into STIGViewer, allowing end users to thoroughly review and analyze the outcomes of the hardening process.
Update quarterly STIG release
As mentioned, STIGs are updated quarterly. With the automation outlined earlier, transitioning to these new STIGs becomes streamlined. We focus on each new release, utilizing our comparison stage to identify any disparities, and then follow through with the standard update procedure.
Summary
Implementing DISA STIGs offers significant benefits, providing customers with hardened images that prioritize security and compliance. Through meticulous configuration and automated deployment, our framework ensures swift access to robust, compliant images. With the ability to generate and update images in alignment with the latest STIG releases, we remain agile in addressing evolving security needs. This proactive approach ensures continuous compliance and protection against emerging threats, positioning our customers at the forefront of security readiness.
Riyya Ahmed
Our Senior Technical Writer and Product Marketing Manager, Riyya, is exceptional at authoring, organizing, and simplifying our product documentation. Using her keen eye for detail and wealth of experience in tech, Riyya helps our clients and partners seamlessly integrate with industry-leading Zero Trust CDR.
See what Zero Trust file protection looks like. Live, in 25 minutes.
A tailored walkthrough of how Glasswall rebuilds files to a known-good state, removes hidden threats, and provides the intelligence you need to understand file risk.
What's in the demo
See malicious files rebuilt in real time Watch Glasswall remove hidden threats and return a safe, usable files.
Integrate security without disruption See how Glasswall fits into your existing workflows and infrastructure.
Gain complete visibility into file risk Uncover threats, anomalies and hidden file intelligence.
“
Beazley's security is paramount, and this integration has significantly reinforced our cybersecurity framework.
Thank you! Your submission has been received!
Oops! Something went wrong while submitting the form.